It’s no secret that WordPress is one of the most popular platforms in our industry. There are multiple companies in every town and in every country that claim to do WordPress installations and websites. As we know, very few of them are doing it well and to the level of quality that best suits the client’s needs, so the competition is fierce and the market is flooded. That being said, there’s one uncommonly-known use of WordPress that your competition may be overlooking: Using WordPress as an intranet.
Once upon a time, when people asked me to explain the merits of WordPress versus another CMS, somewhere in my evaluation I would mention that WordPress was, at its heart, a blogging engine. While that may have been true in the past, it’s about time I dropped that line from my spiel.
In truth, WordPress has grown far beyond its blogging roots, accumulating powerful capabilities that allow it to drive a variety of websites, including portfolios and ecommerce sites. Custom post types, custom taxonomies, and a rich variety of plugins offer almost limitless options for building a website to meet a variety of needs. In this tutorial, we’ll take a look at some of the tools that can help you use WordPress as something other than a blog.
Using WordPress as an intranet will not only set you apart, but the market for using WordPress as an intranet is virtually untapped. The companies that need an intranet also typically have higher budgets and more capacity for large projects.
Introducing: Our Intranet
WordPress is an ideal platform for creating an intranet for a small business, not only for its cost (free), but also for its ability to be customized and its ease of use. Planning is the first step in building any website, so let’s think of what we’re going to need for our intranet:
- A “news” section
- Categories and tags to organize our intranet’s static pages
- Access control (we only want employees to be able to read the content)
- A static home page
- No comments
Goodbye, Posts. Hello News.
The default WordPress post types come in two flavors: Posts and Pages. Posts are what you would typically think of as blog entries. Often they’re time sensitive, pertaining to news or current events. In a typical blog they would usually have comments associated with them, but in our intranet, we’re not going to need comments (but we’ll get to disabling them in a little bit).
Since this isn’t a blog, per se, and our news items are just that, not blog posts, the first thing we’re going to do is to rename our Posts appropriately. In a previous post, I advocated separating out custom post types into a site plugin, rather than tying them in with your theme. Since changing the name of our Posts to “News” runs along the same lines, I’d suggest doing the same here.
In your wp-content/plugins directory, create the subdirectory intranet. Inside that subdirectory, create a file called intranet.php. Then edit the file to add the appropriate header information:
<?php
/*
Plugin Name: Acme Intranet Customization
Description: Custom code for the Acme Company Intranet, not strictly theme-related
Author: Tracy Rotton
*/
While plugins in the WordPress plugin repository contain much more thorough headers with a lot of additional information, we can keep the header for our own plugin simple since it’s going to stay internal. In fact, all that’s really needed is the Plugin Name.
Once that’s done, don’t forget to go into “Plugins” in the admin section to activate it.
Changing our Posts to News
WordPress doesn’t let you completely remove a native post type, such as Posts, from the system. And since our “News” items share many of the same characteristics of WordPress’ native Posts, we’ll leverage the native Posts post type by renaming it “News.” To do so, insert the following code into your Intranet plugin:
// Change "Posts" to "News" in the admin.
add_action( 'admin_menu', 'intranet_rename_post_to_news_menu' );
add_action( 'init', 'intranet_rename_post_to_news' );

function intranet_rename_post_to_news_menu() {
    global $menu, $submenu;

    $menu[5][0] = 'News';
    $submenu['edit.php'][5][0] = 'All News';
}

function intranet_rename_post_to_news() {
    global $wp_post_types;

    $labels = (object) array(
        'name' => 'News',
        'singular_name' => 'News Article',
        'add_new' => 'Add Article',
        'add_new_item' => 'Add Article',
        'edit_item' => 'Edit Article',
        'new_item' => 'News',
        'view_item' => 'View News',
        'search_items' => 'Search News',
        'not_found' => 'No News found.',
        'not_found_in_trash' => 'No News found in trash.',
        'parent_item_colon' => null,
        'all_items' => 'All News',
        'menu_name' => 'News',
        'name_admin_bar' => 'News Article'
    );

    $wp_post_types['post']->labels = $labels;
}
The first function changes the name of the Posts in the left menu bar in the admin interface. The second function changes the name of the Posts on all of the edit screens for Posts. To the WordPress software, it’s still a Post. But in your administration, you’ll see the word “News,” which will make more sense for your content creators.
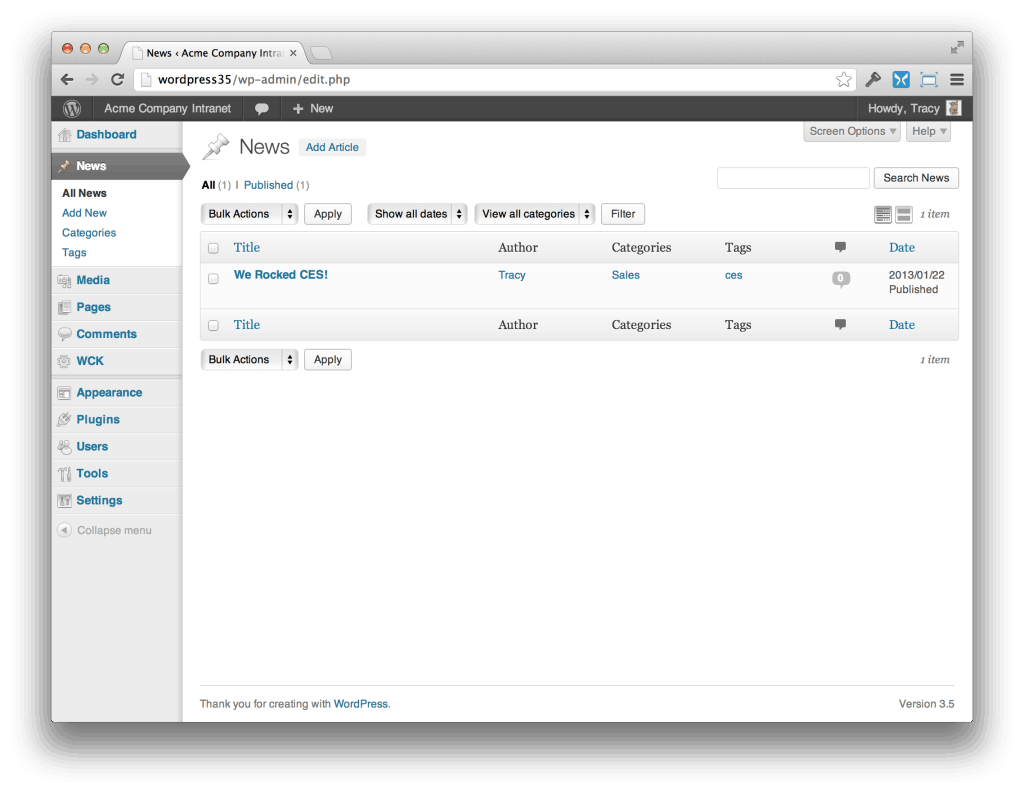
Posts? We don’t need no stinkin’ Posts! What we do need, however, is News.
Organizing Our Pages
Being an intranet, the core of our content is going to be in the Pages. By default, WordPress doesn’t allow you to assign categories or tags to Pages, but such taxonomies would be very useful in organizing our content. Fortunately, it’s a simple matter to add these taxonomies to our Pages.
Let’s start by downloading, installing and activating the “Custom Taxonomy Creator” plugin from the WordPress repository. Once activated, you’ll see a “WCK” item in your left nav. This plugin provides a simple interface for creating all the custom taxonomies you need and attaching them to any post type, native or custom, that you need.
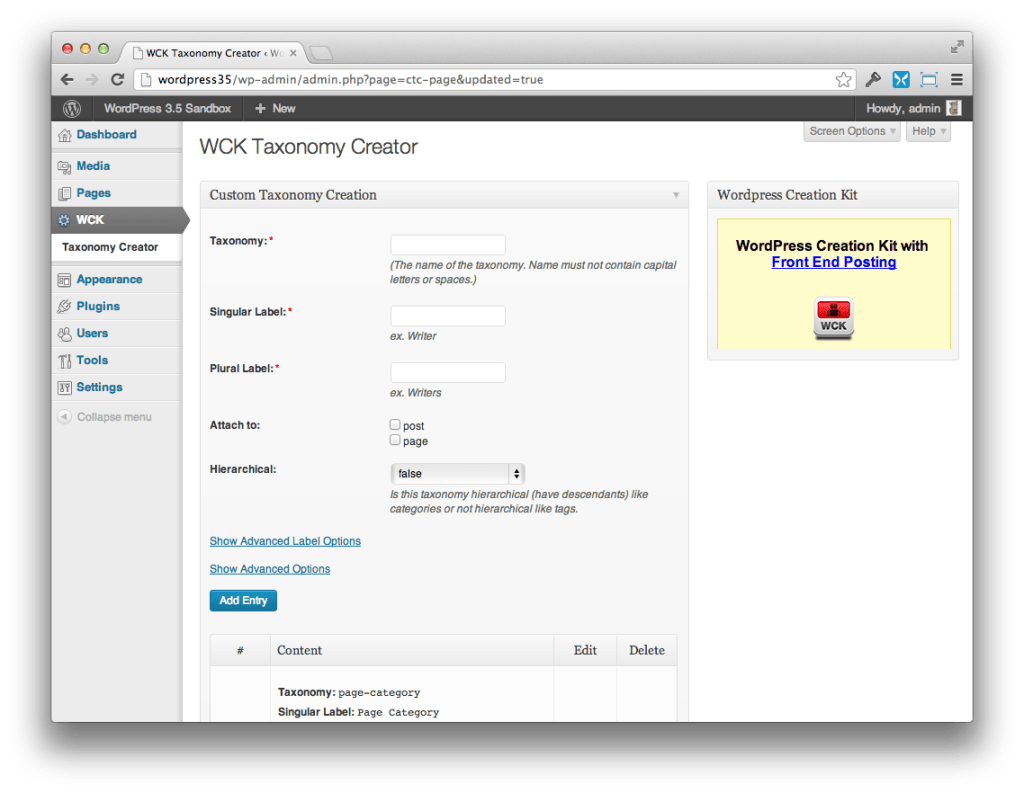
Custom Taxonomy Creator makes creating your own taxonomies as simple as filling out a form.
Our taxonomy needs are going to be pretty basic, so go ahead and set up “Page Categories” and “Page Tags.” Remember, in the WordPress world, categories are hierarchical, while tags are non-hierarchical.
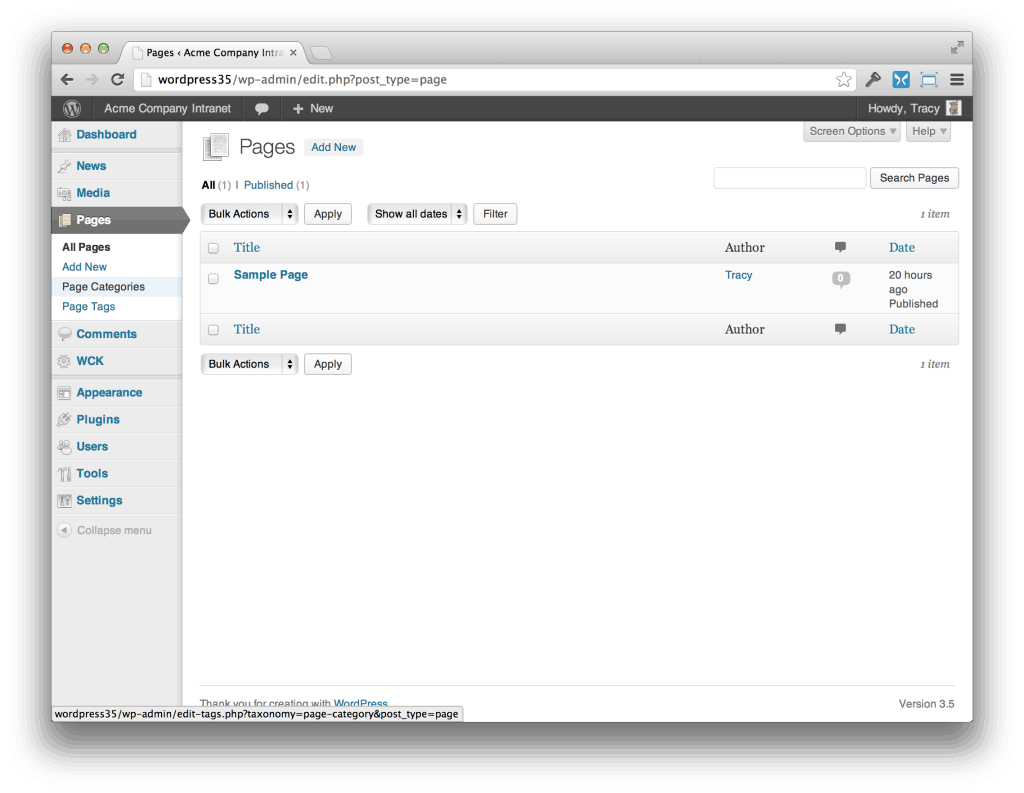
Now when you go to edit your Pages, you’ll be able to add categories and tags to go along with them.
You Shall Not Pass! (Okay, Maybe You Shall)
We don’t want our company’s deepest, darkest secrets accessible to all the world, so we need to devise some way to keep our intranet’s content for only employees’ eyes to see.
In our hypothetical world, we want to allow access to our intranet only to those computers which are physically (or virtually) inside of our company’s network (unless the visitor logs in). This is the logic behind IP-based access control, where access is granted to only those machines who are assigned an Internet Protocol address in a specified range.
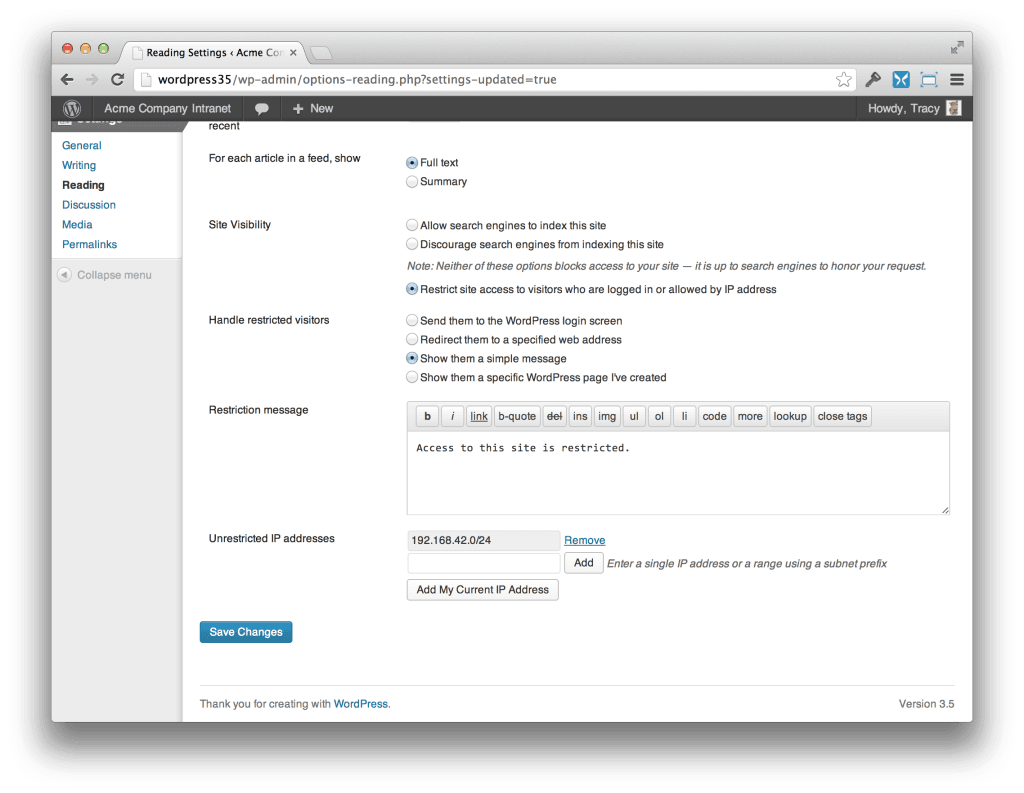
A useful plugin to do this at the WordPress level (this can also be done at the webserver level, but that’s outside the scope of this post), is with the plugin Restricted Site Access. After installation and activation, navigate to “Settings -> Reading” and scroll to the bottom to find your restriction settings. An additional option is added to the “Site Visibility” section that allows you to “restrict site access to visitors who are logged in or allowed by IP address.” Selecting this option, then entering the permitted IP addresses below will keep our intranet for internal use only.
Keep in mind that there are risks for using IP-based access control, the first and foremost of which is that IP addresses can be spoofed. Also, this plugin would allow those with accounts to access the site from anywhere if they were to log in. If you absolutely, positively must keep access to within your network (not that I advocate this approach necessarily), I would suggest that you investigate webserver-based IP access restrictions.
There’s No Place Like a Real Home Page
We’re going to want to set up our home page to be something other than a list of posts. After all, the primary purpose of our intranet is not the news, necessarily, but the static information that contains company policies and the like. Setting this up is straightforward: in the administration dashboard, navigate to “Settings -> Reading.” At the top, select “Front page displays A static page.” Then choose which static page will be the home page.
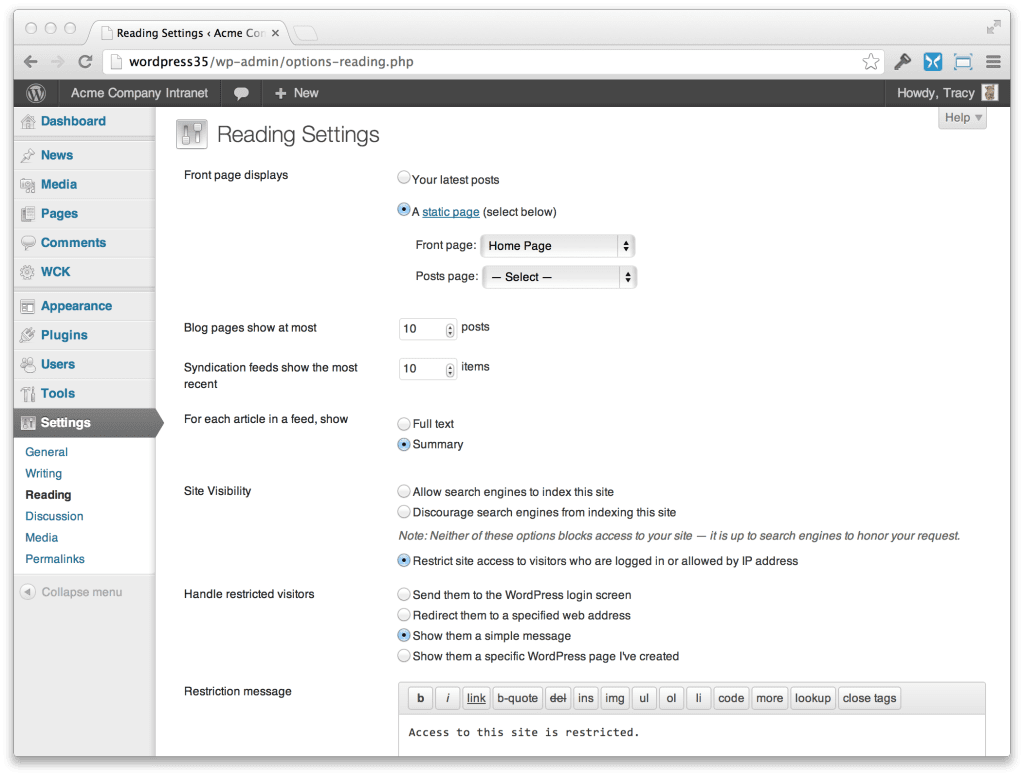
Not to go too far out on a limb, but I’ve made the static page “Home Page” my designated site front page.
Disable Comments Site-Wide
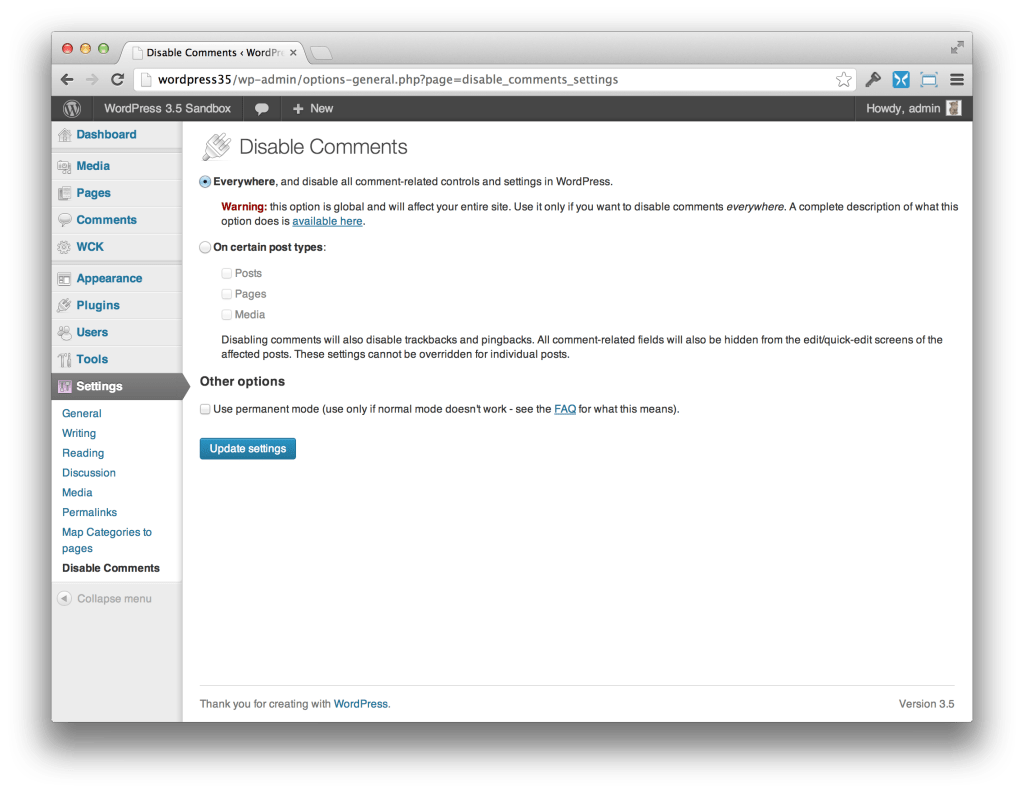
If you’re strictly (or at least, primarily) using WordPress as a CMS for non-time-sensitive content, chances are you aren’t trying to drum up conversations about that. After all, do you really need comments on your list of pay dates? Probably not. An easy way to globally turn off is with the plugin Disable Comments. Install in the usual way, then under “Settings -> Disable Comments”, click the “Everywhere” radio button. Alternatively, you can choose to allow posts on your News articles, and just block on Pages. The choice is yours.
Conclusion
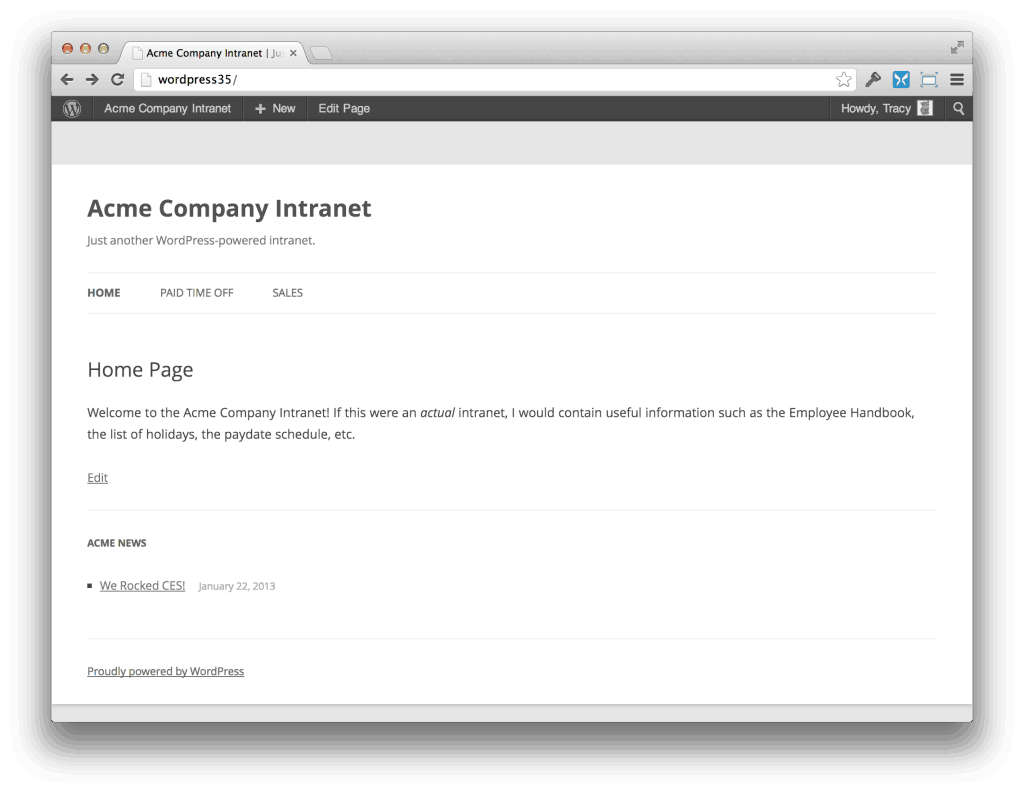
With a combination of plugins and a touch of customization, we have the beginnings of a beautiful intranet, one that will allow our employees to have all the information they need to do their jobs right at their fingertips. Can more be done? Of course. With WordPress, the options really are limitless.
The post A New Way to Use WordPress to Kill Your Competition appeared first on Treehouse Blog.